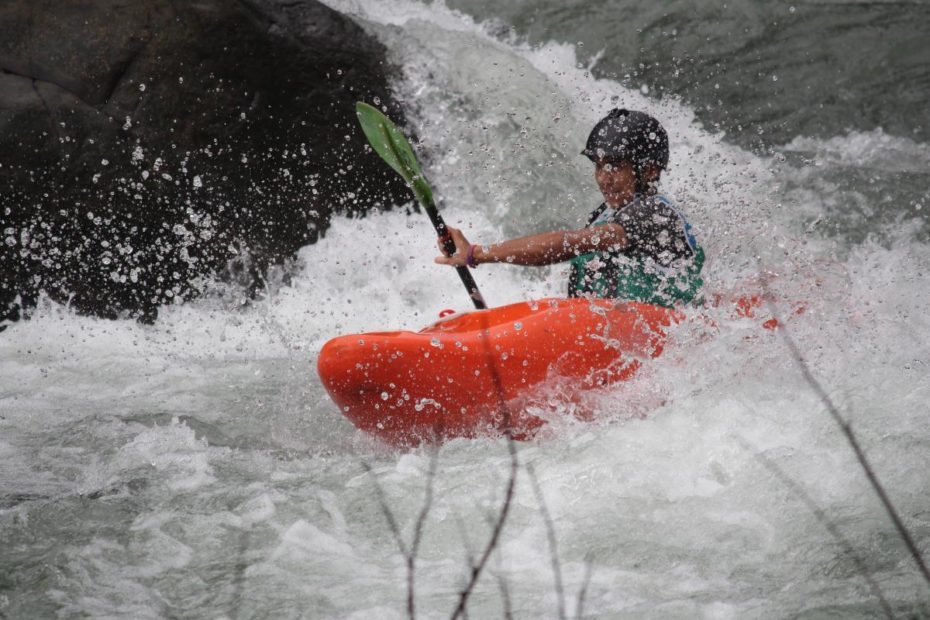
One of the most intriguing skill in kayaking is how to do Eskimo roll. We often hear, “Hey I saw you negotiating those monster waves, it was insane. I’m sure it is super fun but I am just afraid of one thing! What if your kayak flips?”
That is probably the most asked question by people who are alien to the world of kayaking. Rightfully so, as from the outside everything might look so adventurously luring but eventually everything boils down to what if one capsizes?
So we’ve come up with the answer and the good news is that you can come up alive and intact in your kayak. It requires a technical move involving many parts of your body. This magical technique is famously known as the Eskimo Roll.
The Eskimo Roll
The safest, the most tried and tested move to recover yourself after capsizing is the eskimo roll. It can save you a lot of time and effort as you don’t have to get out of the kayak in cold waters, get rid of gallons of water and get back in the kayak again. There are quite a few ways in which you can do the eskimo roll and different instructors would teach you different variations. It might also depend on the way you find it the easiest. Although through this article, we would share the most commonly taught techniques of executing an eskimo roll.
To explain how to do eskimo roll, we shall deduce the anatomy of a successful eskimo roll step by step:
The Setup – This is the first and one of the most vital element of a successful roll. Tuck your body ahead, close to the deck of your boat. Place the paddle just at the surface of the water, the back face of the paddle should be the one facing the surface flat. The paddle should be placed to your weaker side. The trick here is to lean ahead and push the paddle as down below as possible while being upright.
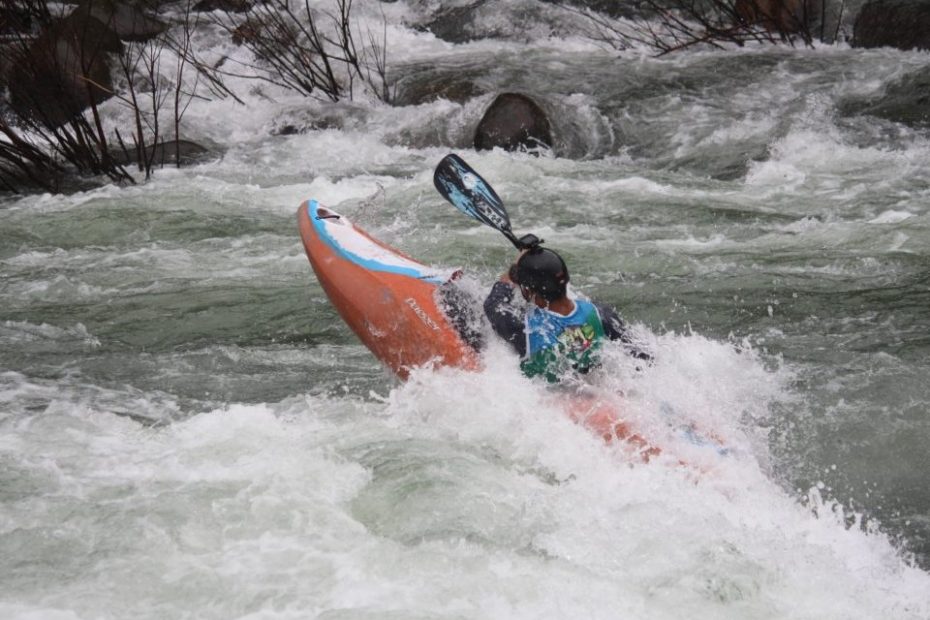
Lean Out and Pause – Once you’ve done setting up, flip yourself voluntarily towards the side your paddle is. The moment your kayak is inverted lean your towards the side of your paddle. This is the point wherein presence of mind comes into play. You need to be fully aware of your body movements and not get disoriented. Hence a pause is essential, before moving onto the next step. So once you’ve leaned out stop for a moment and analyze the next move.
Sweep and Snap – Once you’re inverted completely, your paddle shall emerge on the other side of the water with the power face now facing the surface. (NOTE : Remember step 1 where leaning and pushing your paddle down is crucial as while emerging on the other side, your paddle will be just above the surface as required) So after the crucial PAUSE comes in the grand move. The sweep and the snap. You need to make a motion with your paddle which would be a sweep. You’ve got to move the paddle on the surface of the water away from you until it is at a perpendicular angle with your boat. The movement will make a wide arch with your paddle. Remember if you’re sweeping towards the right, your left arm acts as pivot and it should stay closer to your chest and not go high! While doing the sweep, you need to engage your knees and hips. Let us assume we are doing a right side sweep. In that case, we shall push our left knee in the outward direction and snap our hips towards the same left direction. All this should be in a single sweet action.
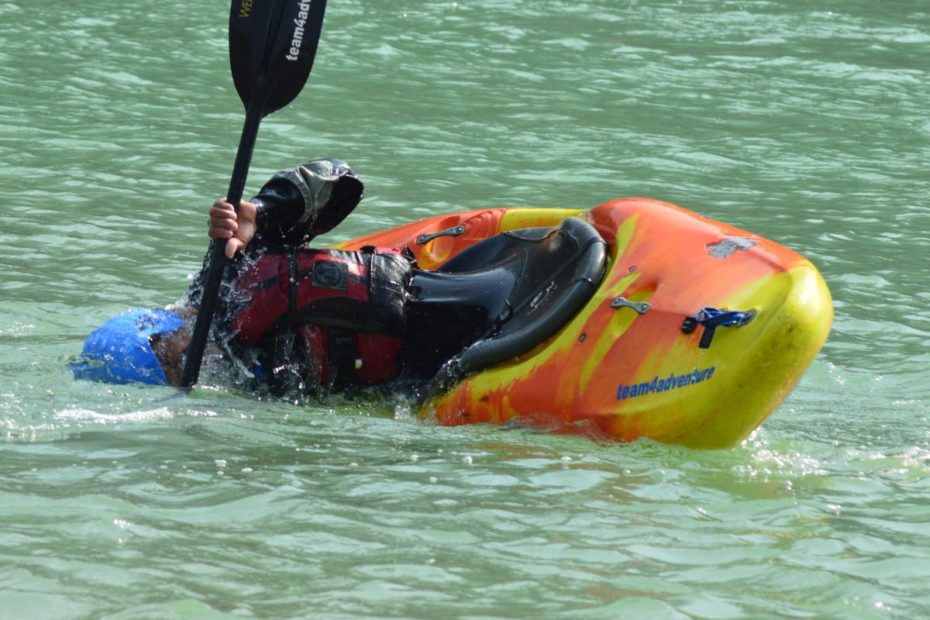
Position of Head while emerging – After having swept and snapped, you’ll probably see the sky if you did it right. The next step is to ensure that your head remains tilted in the direction from which you are emerging. This is a bit complicated to grasp as it is counter intuitive. You would want to withdraw your head out of the water first. Although this instinct needs to be curtailed ! You need to remember that the head comes out of the water after the major part of your body is out.